

It feels innately warm, the virescence of spring, the electric glow of green budding against an often grey or pallid blue sky. Inside, for over a month, tiny cups of earth have been scenting the house, warm and ancient and fertile. And every day for the last few weeks, a new raised disturbance in the surface of the soil, a loop all serpentine and pale milky whitish green appears, one leaf, then two, unfolding and stretching and rolling out in a slow vaguely feline style.
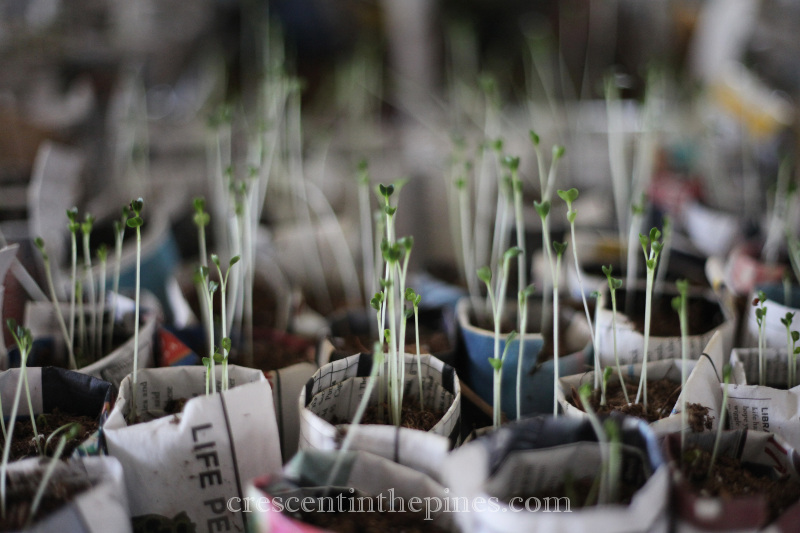
And every time I pass the counter where they’ve taken shelter from the passing snows, I smile. The heart shaped pairs of purple green leaves on the baby cabbage, pointy long stems of onions 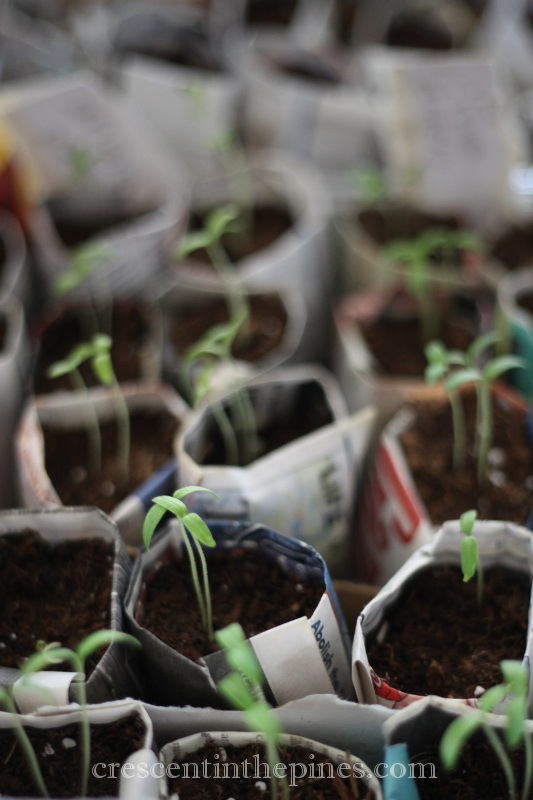 and leeks unfurling like tiny whips, the heart like curls of eggplant and peppers first leaves, the showy bold overachievers that are rapidly growing young tomatoes.
Every year come beginning of February, newspaper page after newspaper page is rolled into tiny cups and seeds are begun, tiny wishes for spring, tiny hopes for tomorrow. And hour after hour is poured into their care and nursing, every one that fails mourned, every one that grows stronger with each passing hour a source of excitement. And by this point as we close in on the equinox, being in a warmer region I am closing in on the last of those seeds started indoors rather than directly sewn and my early spring crop is in the greenhouse, taller every day and basking in the warmth and light of longer days. But for those in cooler climes soon to start their seeds, those hurrying to start a small mid or late season garden, those exhausted with the cost of seed starting equipment and looking for a new way, or even those who’ve never tried seeds started on their own before and anxious to do so, I offer this, my spring gift to you, a guide, a how to of home spun seed pot making.

While I enjoy bringing up some of my seedlings in makeshift seed trays, for others which will require potting up or other transplant, I needed a new kind of seed pot as store bought are costly. Thus, a few years ago I started making this style of seed pot which is not only inexpensive save for effort involved but also reduce transplant shock as they can be planted with the young plant whether potting up or directly into the garden and will decompose under the plant. From about the last week of February through the spring, I can be found sitting on the couch rolling tiny seed pot after seed pot when Josh and I watch movies. Yes, it’s that simple.
To start, you’ll need newspaper and seed starting soil, either your own composted or store bought. In a future post, I’ll be more in depth about soil prep for seedlings, but for today I am concentrating on these containers. Half a standard newspaper page is what you’ll need per cup, although your local free paper is often exactly the size you need. (Hint from someone who once worked at a weekly: hit them up on Wednesday afternoons when they’ve changed out the latest editions. Old copies usually go to recycle anyway so they or a business carrying them won’t mind parting with a stack of their leftovers from the previous week.) Whether using a page of your local weekly or a half newspaper page, fold it in half lengthwise for added strength like so:

The size you roll at this point is up to you and the size you want will determine what you roll you newspaper around as a form. Bottles, small glasses, a small clay pot, or any number of things will work. You can do a slightly larger roll for a makeshift 2″ pot, but I’ve had no luck with even the finest examples of my seedling pot origami holding up under enough waterings to make rolling pots that size worthwhile. Typically I find a very technical gardening tool, namely any one of my collection of hot sauces’ bottles, to be the perfect size for a pot large enough for seedlings to establish and grow well into their true leaves before needing potted up or garden planted. Starting at either end of your folded paper, at a slight angle lay your tool of choice (we’re saying hot sauce bottle from here in) so that at least a third of your folded paper is exposed underneath. The amount you leave exposed will be determined by how deep you want your seedling pot. Roll the paper somewhat tightly around the hot sauce bottle keeping the angle slight and when completely wrapped, fold the end as though you were packaging a gift, over from once side then the opposite, staring just passed the opening, like so:

A better view of those amazing folds:

Typically I make three folds for strength, but if you are leaving less end exposed you will most likely only have room for two. Once your folds are made, start rolling inward from the point of the folds toward center:

As you remove your new seed pot from the hot sauce bottle, shove inward on the folded section and gently squeeze the end, creating crimps and less likelihood of the whole shebang coming undone:

This is where the slight angle you rolled your new pot at comes into play. You should, at the top of the pot, have a section of paper sticking slightly up. Once folded, that piece helps strengthen the top of your new seed pot:

Fill your new pot with fresh seed dirt and plant your baby seeds at a depth appropriate to their type. Lined neatly in your seed tray, or paint tray liners as I prefer for cost effectiveness, your little seed pots will produce readily until you are ready to transplant, pot and all.


What a wonderful idea! So neat, definitely going to try this as I have seedlings growing and more seedlings to pot on.
LikeLiked by 3 people
Thank you 🙂 It’s a great money saver for sure.
LikeLike
Reblogged this on ditto and file.
LikeLike
A lovely stream of images and words in this post and an innovative way to sprout seedlings. I was inspired by this post and tried this last evening. I found it a bit difficult to keep the paper sacks from spilling over until they were packed together in a small packing box, which I pulled from my recycle bin. Hopefully this works for me as well as it has for you. If it does, I will most likely use this idea every year. Thank you.
LikeLiked by 1 person
I’m glad the idea helped you. I often have the same problem with keeping them upright at first, but after a few you develop a rhythm and packing the bottoms to a level flatness starts to happen on almost all of them.
LikeLiked by 1 person
Today I was greeted by cucumber seedlings which sprouted using your newsprint idea. Thank you for sharing, I will likely adopt this as a part of my gardening from now on.
LikeLike
That’s wonderful! Spring is the best. 🙂
LikeLike
Pingback: Seed starting and the novice. |