Latest Posts

Harvest Cornbread

Summer is more so an emotion than a season. Annually it arrives, heat and hazy sunlight, a shimmering mirage of memories forgotten and ghosts of summers past, of childhood and yesteryears. And each summer has its own personality. Some come particularly hot and lazy, sprawling languid and driving anyone within reach to naps and slow eyed ruminations. Others come cool and soft, all lush greens and gentle breezes. But the best days are the rainy summer days.

hc1post      hc2post

Awake and ready to face the morning’s tasks, I wasn’t what you could call saddened at the sight of rain coming down the a.m. A cup of coffee and front porch sitting in the cool air came as much needed comfort. I frequently forget to pause lately and those not so subtle reminders are less pesky than welcome.

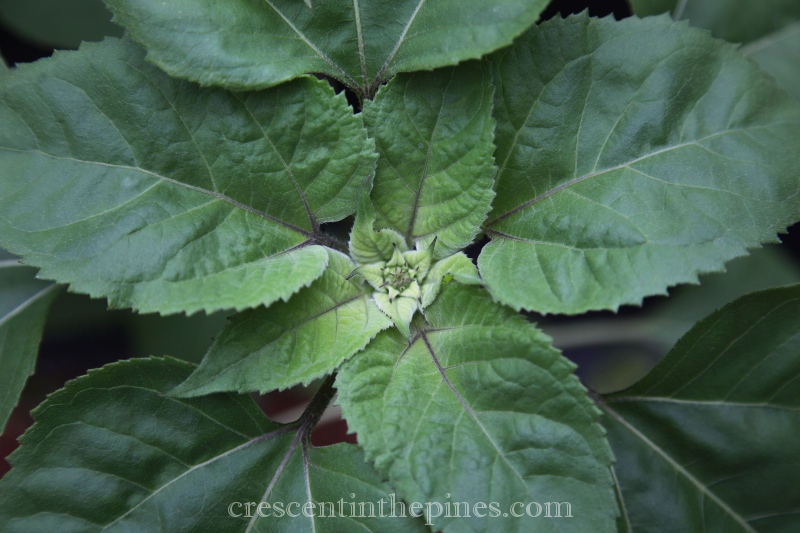
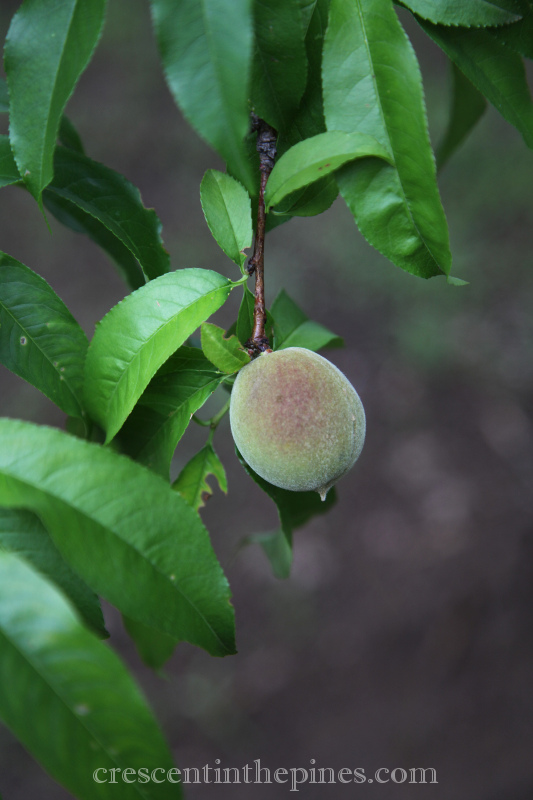
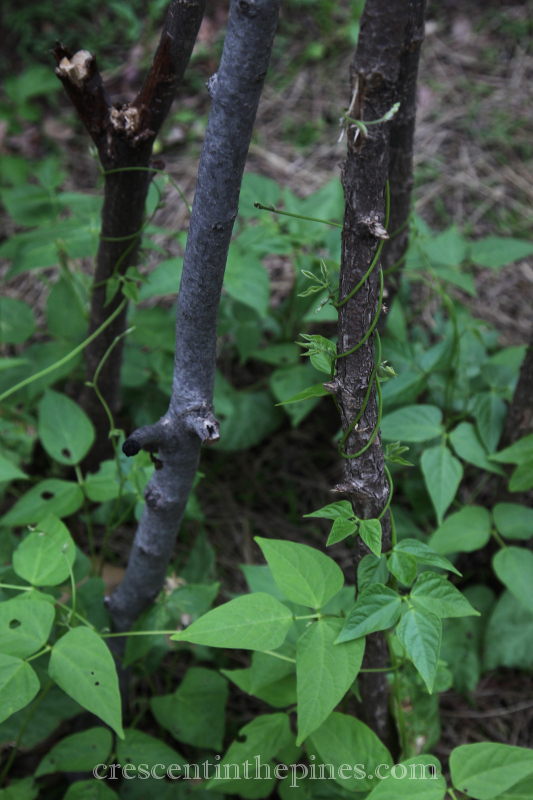
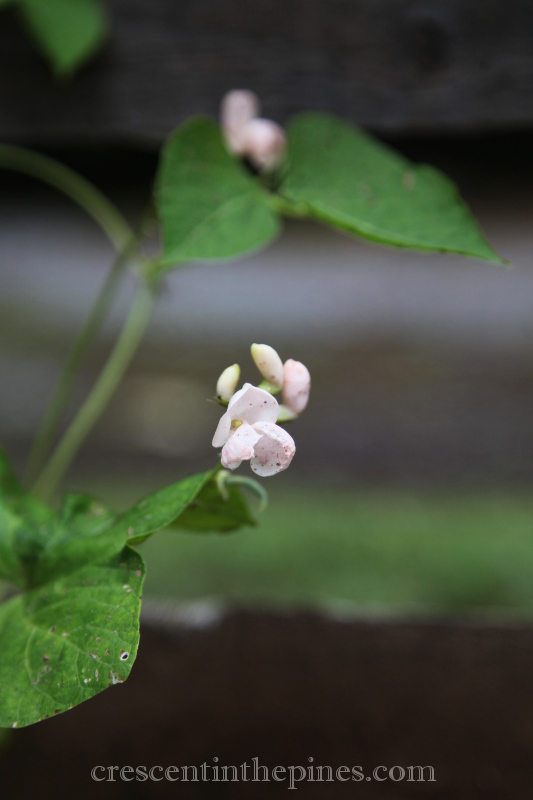
Gardening is in full swing with necessary tasks compiled daily. Weed, water, harvest, prune, keep vigil for pests, fertilize, repeat. In that way, the art of gardening is imitating life lately. A series of tasks toward a higher goal eating up hour after hour of every passing day. And in the heat, the early bird gets whatever the early bird gets before the sun rises too high and that time is long devoured in fast course. But not today. Today the rain came down, rhythmic and soothing. Soft summer rain is among the finer things in life, cleansing, cradlesong like in its ability to soothe a too hurried mind.

hc3post

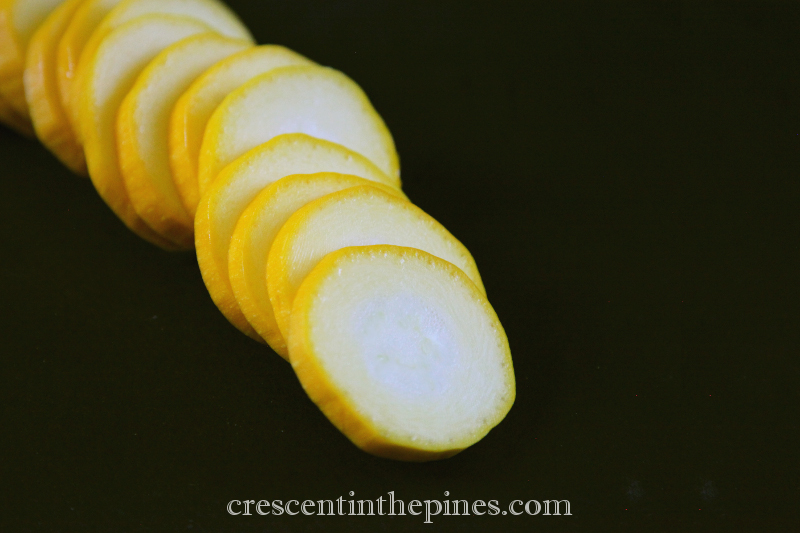
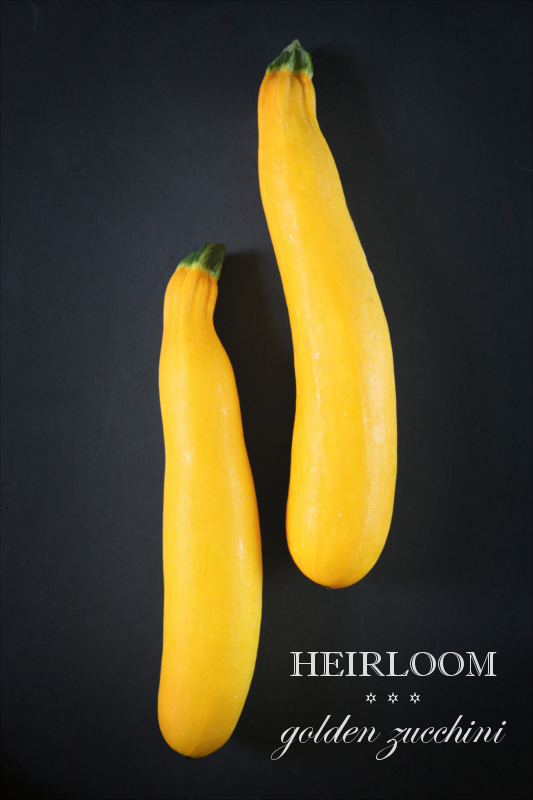
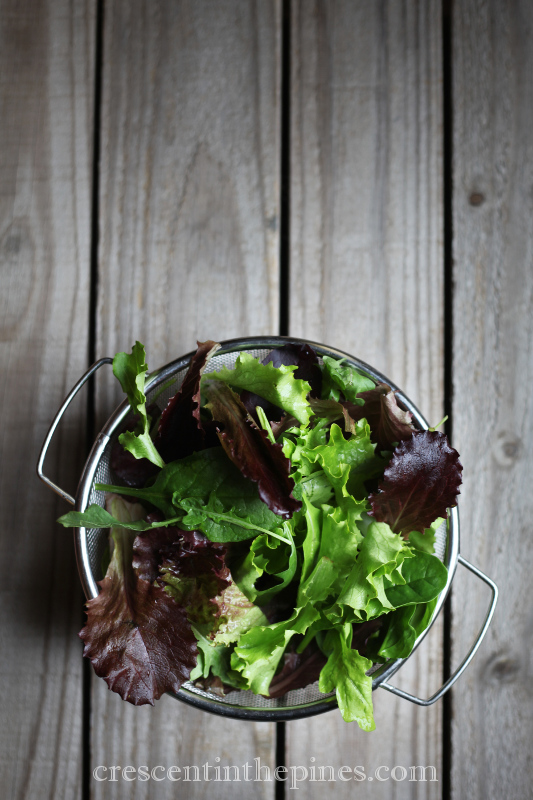
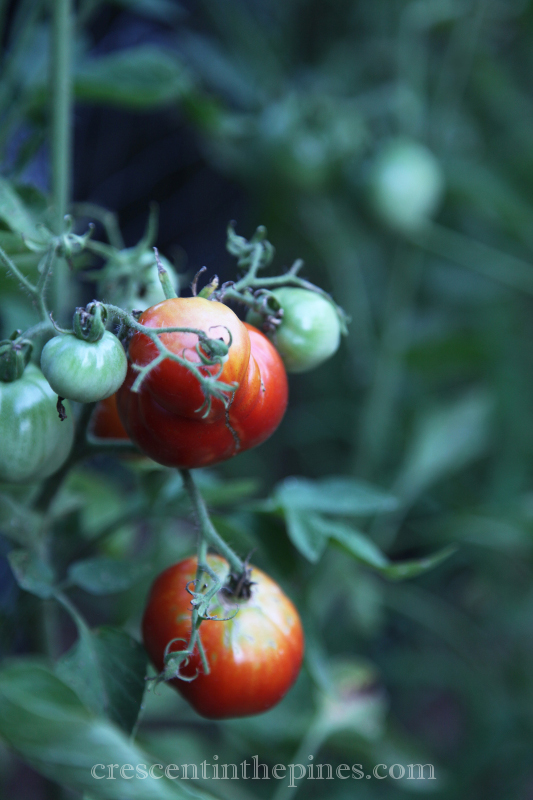
With only time left for a few quick tasks before the post rain humidity and heat came for the day, harvesting was tantamount. Harvests have been plentiful this season, to the point of necessitating either giving away bags of vegetables or coming up with new ways to use them on the fly. This recipe is one such concept. Love standard cornbread though I do, I have never been a Bible (or recipe book) thumping cornbread purist and frequently play with adding seasonal items or cheese or spices, among other ingredients.

hc4post

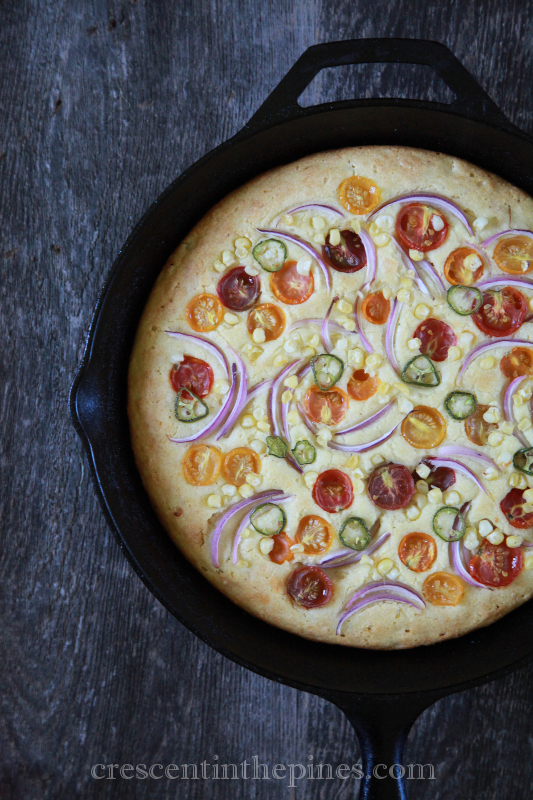
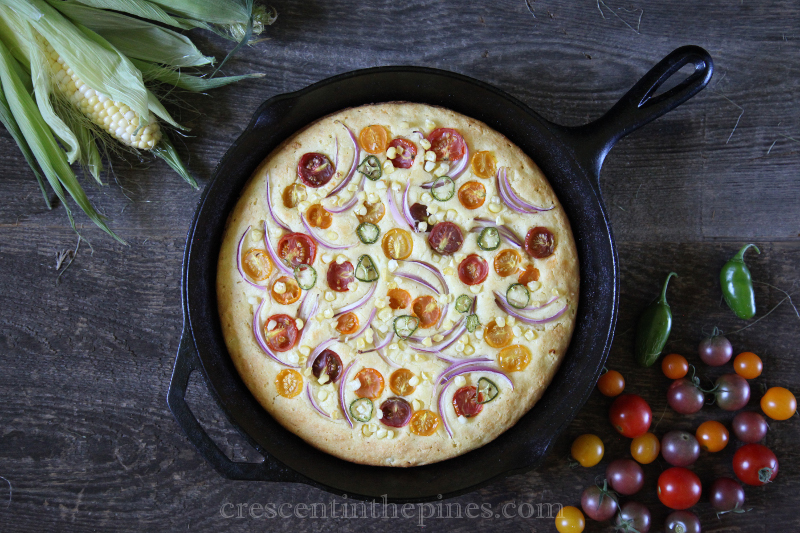
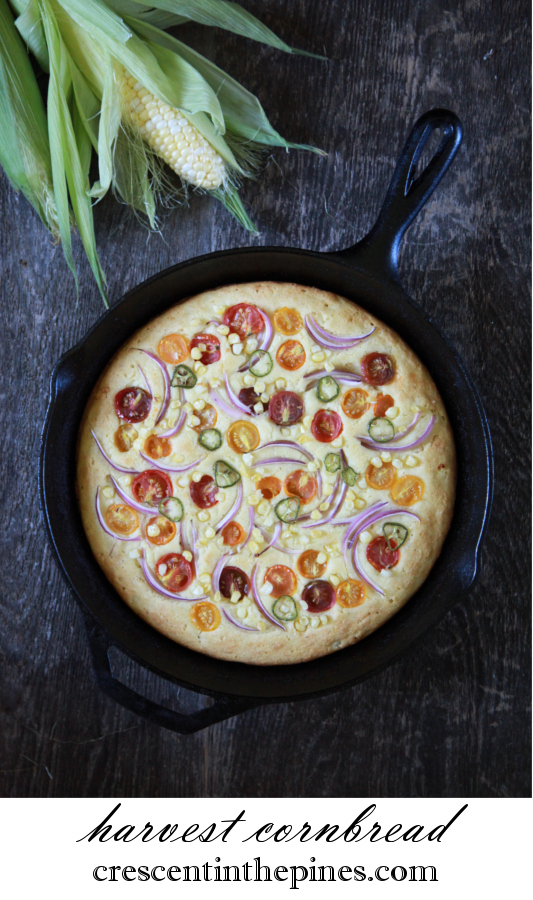
Cornbread lends itself ideally to mashups with new ingredients, both holding its own flavor yet being mild enough by nature to allow additional ingredients a platform from which to shine. In this case, vegetables are the feature, with the fresh corn amplifying the bread’s flavor and the other veggies playing off same. I used what I had an abundance of but do play with this platform, adding and subtracting with whatever vegetables you have available. Fresh from the oven with a bit of butter, this bread is perfect to enjoy on the front porch while summer rain comes down.

HARVEST CORNBREAD

hc6post½ cup melted butter
2 cups self-rising white cornmeal
½ cup all purpose flour
1 ½ cups buttermilk
2 large eggs
1 cup corn kernels, divided
1 cup cherry tomatoes, halved
1 jalapeno or other pepper of choice, sliced
¼ cup thinly sliced red onion

Preheat oven to 425. Pour approximately 2 tablespoons of vegetable oil into a 10” cast iron skillet and preheat the skillet in the oven for 5 to 10 minutes.

In a large bowl, whisk together cornmeal and flour. In a medium bowl, whisk together egg, melted butter and buttermilk. Add the buttermilk mixture to the cornmeal mixture and stir until moistened. Fold in 2/3 cup of the corn kernels. Pour batter into pre-heated cast iron skillet.

Bake for 10 minutes. Carefully remove skillet from oven and top partially cooked bread with remaining 1/3 cup of corn and tomato, pepper, and onion. Return skillet to oven and bake until golden brown, 15 to 20 minutes longer. Remove from oven and immediately remove from skillet.

Notes:
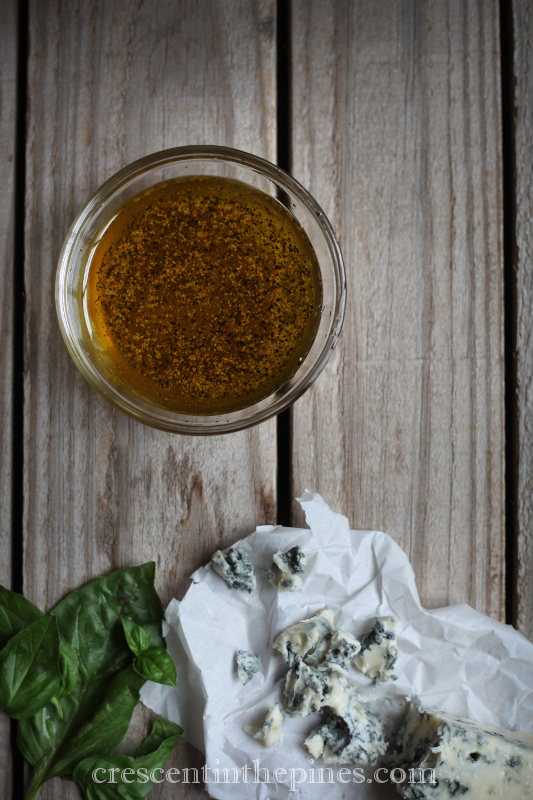
I do love cheese and this recipe is perfectly suited for the addition of about a cup worth. Use any kind you prefer and divide it evenly between the batter mixture and the top of the bread or just sprinkle it on top of the bread with the vegetables. You won’t be sorry!

Don’t like spice? Swap the jalapeno for a sweeter pepper. Or no pepper at all! The vegetables listed above are by no means required. Pick and choose with what you have fresh and available and change it up. Herbs make a fun addition too. Cornbread lends itself perfectly to nearly any flavor pairing so your imagination is the limit.


Heirloom: Weissbehaarte Tomato

In much a similar way to parents being shunned from having a favorite among their children, it feels wrong to say I have a favorite section of my garden. But I do.

The cornstalks are shiny and stately rustling in the plains wind, the deep jewel green leaves of the squash plants are mysterious and exotic, the bright rows of herbs and lettuces are as lovely as any flower garden. But there is another section, a haven, a quiet sort of oasis of sweetly sharp scented leaves and jeweled toned heirlooms in every shade of purple, red, brown, white, yellow, pink, and orange: the tomato section. From the first of their unique scent at the end of winter when early tomatoes are peering brightly up at grow lights to the last days of harvest in fall when the last fruits are small and more useful for seed than culinary purposes, tomatoes will always be my favorite plant to grow.

wt2post      wt3post

Thus every year the heirloom features here will no doubt include a tomato type, this year being no different than last on that count. And once again, like last year, one of the standout tomatoes this year has been a saladette cherry type, namely weissbehaarte. Not only is the weissbehaarte prolific to the point of overwhelm from early to late season, but for someone who would rank white types as her least favorite of the many hues of tomatoes, the taste is surprisingly delicious. They are milder than awt1post typical white tomato and are particularly visually appealing when served fresh in salads or on an appetizer tray. Their skin is remarkably smooth with high crack resistance and in color ranges from a soft near white pale yellow to bright pastel sunshine gold. Such a unique and pretty tomato type, they are not only an attractive plant in the garden, but also garner many compliments on the table.

Weissbehaarte (Solanum lycopersicum ‘Weissbehaarte’) is an old German heirloom. Skin is thin and silky, pale yellow in color. One to two ounce plum/salad type. Vines grow large with plants growing six to eight feet and produce prolifically. Very easy to grow with enough space. Indeterminate, 75-80 days.

Heirloom: Golden Zucchini

It’s strange, the difference a year can make. Looking back at how different one June can be from the last is nearly dizzying. Sometimes the comparison is heartbreaking. Other times it is a welcome reminder. In the garden, the difference between any two seasons is palpable and as one toils it isn’t difficult for the mind to wander between comparisons of this and last season’s gardens to this and last season’s daily challenges or successes. While the daily life of this summer has been more challenging than most, the season’s garden has been for the most part a dream. Especially the squash.

yz2post        yz3post

Two seasons ago, all my squash were attacked and rapidly killed by squash vine borers. By rapidly, I mean my plants were done for before I even realized what was happening as I had never encountered vine borers prior to that season. They also summarily destroyed my gourds and melons. Devils.

Last season came torrential rains, blighting most of the garden and smearing the rest with powder mildew. When the rains finally broke, the weather immediately shifted into drought and extraordinary heat. And with the heat came uncontrollable swarms of squash bugs. Also devils.

yz4post

But this season, an overabundance of summer squash has been the way, especially from two prolific white squash types and three of the four zucchini types.

One zucchini in particular has found its way onto my favorites list, even though it was old seed gifted to me and initially it seemed as though none of the plants were going to come up. In the end only one plant did come up, but when it did it came up to beat the band, currently standing at just under three feet tall and consistently producing two to three fruit almost every other day.

Not only is the plant sizeable and very attractive, featuring large shapely leaves in stunning velvety green, but the fruit is the most beautiful sunshine yellow and the taste is slightly more mild than green zucchini types. Even if allowed to mature on the plant, at which point their size grows yz5apost1rapidly and their color becomes a deep gold near orange color, this type does not become especially seedy and maintains its excellent flavor. This and cocozella are my personal go to’s for zucchini dishes as both maintain their flavor and texture perfectly when cooked. Never though have I seen such a both prolific and delicious zucchini type and so Golden Zucchini found a place here as a recommended heirloom for your own garden.

Golden Zucchini summer squash was developed by W. Burpee. They are very prolific bush-type plants. Harvested at six to eight inches, they feature stunning glossy bright yellow skin. Easy to grow direct sewn, but requires space. 50-55 days.

Spring Green Salad with Gorgonzola Vinaigrette

This is the strange time of year when change is exaggerated, when I look at photos of the garden from only a few weeks ago and the rate of growth borders on preternatural. Seeds just budding last month are mature plants now, in the process of producing. And a garden tilled not long ago all dirt and rows marked by hay and mulch has gone from shades of clay and dirt to shimmering bold greens of every tone.

sp1post   sp2post

sp3post

sp4post   sp5post

sp6post

sp7post   sp8post

The world seems greener this year than any years in recent past. Nature shivers emerald, all gossamer leaves on the rainiest days and bright forest tones in the sunshine. Most days are rainy, albeit not like last year. And warm. So warm already that the early greens and cooler tempered plants are bolting while the squashes and tomatoes are sprawling in their takeover for the season.

With all the cool natured plants in a race to bolt, recipes center around making the fullest use of their produce. And so, a simple salad. Quick to make but as fresh and rich with flavorful green as the end of spring is.

sp9post

sp11post   sp10post

SPRING GREEN SALAD WITH GORGONZOLA VINAIGRETTE

sp13postAbout 1/2 cup of snow peas, blanched
4-5 thinly sliced radishes
1 or 2 thinly sliced spring onions
About 1/2 cup of basil
3-4 handfuls of mixed spring greens (baby spinach, baby arugula, watercress, etc), washed and dried
1/4 teaspoons salt
1/4 teaspoon freshly ground black pepper
2 tablespoons white balsamic vinegar
3 tablespoons extra-virgin olive oil
1/2 cup crumbled Gorgonzola cheese, divided

Combine 1/4 teaspoon salt and next 3 ingredients (through olive oil) in a small bowl, stirring with a whisk. Stir in 1/4 cup cheese. Set aside.

In a large bowl toss together peas, onions, salad greens, basil, and radishes. Drizzle with dressing and toss gently to coat. Sprinkle with remaining 1/4 cup cheese. Serve immediately.

NOTES:
No, the measurements are not exact. I was working with harvest. I recommend playing with the amounts to suit your own palate.


Spring Pasta with Roasted Garlic Sauce

The words “purple is royal” have been uttered more than once in the last few weeks and as the garden fleshes out in emerald and lavender, ultraviolet and splashes of pearl, I wonder if I wasn’t feeling a bit royal when planting. Or perhaps I have more of my mother’s blood than realized (purple is her all time favorite). Or maybe it was a surprise for E (purple is also her favorite). Maybe all of the above.

sp1post

sp2post   sp3post

sp4post

sp5post   sp6post

sp7post

Either way, the irises are blooming along the fence line, honeysuckle has just begun to perfume the air, and somehow an accidental very purple theme for the first round of blooms has been managed all over the property. It will change as the other flowers come in, pinks, scarlets, and heavenly blues. But for these few weeks, spring has come in royal, all velvet purples and soft lilacs against a deep shimmering green backdrop while indoors the season has come when fresh flowers are always on display straight from the garden. 

sp10post

sp9post

sp8post

sp11post

sp12post

The vegetable garden is also flush with green as all the first plants are well along. Even spots of purple are mixed throughout the herb section. Thus inspired by those early veggies and all the brightness of the season came this recipe. Coupled with roasted garlic and the faint licorice hint of tarragon, early peas and sugar snaps are the feature of this spring dish. As the cool of April and May storms roll by, this pasta is a hearty comfort food highlighted by the first gifts of the warm season’s garden.

Spring Pasta with Roasted Garlic Sauce

sp13post1 cup fresh green peas, shelled and blanched
1 cup sugar snap peas, blanched
Pulps of 6 heads of roasted garlic
Olive oil
12oz fresh pasta
2 slices of pancetta, diced
1 leek, green stalks removed, diced
1 cup sliced mushrooms
¼ cup dry white wine
1 cup chicken stock
1 cup whole cream
1 cup parmesan, plus additional for garnish
Salt & fresh cracked pepper
1 tablespoon finely chopped fresh tarragon, plus fresh sprigs for garnish (see notes)

Prepare the pasta as directed, drain. Meanwhile, to prepare the sauce, heat two tablespoons of olive oil in a sauté pan over med-high heat. Add the pancetta, stirring to coat. Cook until the pancetta is lightly browned. Reduce the heat to medium low and add the leeks and mushrooms, stirring frequently . Sauté until just softened, 2-3 minutes. Add the wine, stock, and roasted garlic pulp and cook until reduced by half, approximately 10 minutes. Add cream, peas, and sugar snaps and heat through. Remove sauce from heat and toss with together with pasta, tarragon and parmesan. Season to taste with salt and pepper. Garnish with fresh sprigs of tarragon and additional parmesan, if desired. Serve immediately.

 Notes:

If tarragon isn’t a favorite, a half tablespoon of freshly chopped mint is a lovely replacement.

This sauce lends itself well to a variety of pasta types but paired with spring veggies, fresh pasta whether homemade or store-bought is best with this recipe.

An excellent how to for roasting garlic can be found here.


Roasted Asparagus and Mushrooms with Lemongrass-Ginger Dressing

Whether the Missouri route or the Arkansas route, it is a long drive back to Oklahoma from Tennessee. The first few hours down the music highway or along the Kentucky byways are pretty enough, but cross the Mississippi and the simplest route on budgeted time is the interstate. Hours on end and the scenery blurs together, especially when you’ve been driving since shortly after one in the morning and exhaustion kicked in with the bright glare of the morning sun.

lm3post   lm2post

Alternate drivers, push through, make lists for projects waiting at the house, sing along with radio, admire the Bostons on the horizon, almost to the state line. A few hours later and home, all draped in bright spring green, everything budded and bloomed, shimmering virescence has shrugged off the last signs of winter in our week long absence.

Strange how quickly things can change, how when you aren’t looking the next season marches in leaving no trace of what was beginning to seem permanent. Just days ago we left blistering winds, drought dried air, and blowing pollen clouds like yellowy smoke from some b-rate horror, but this morning the sun shone softly through the pines and the world looked clean and new. The crepe myrtles and oaks are brilliant green with new leaves, the trees in the orchard have shed their blossoms for crescent shaped emerald leaves and budding fruit, and the early planted section of the garden is maturing rapidly; heads of lettuce, tendrils of climbing peas, first sprouts of potatoes, and heart shaped radish leaves all over. The irises along the fence are blooming velvety purple and pale yellow and even my Japanese honeysuckle is in full bloom, bold fuchsia red against a pallid plains backdrop.

lm1post    lm4post

Best of all, the asparagus planted last year has taken excellent hold and has even produced a small harvest, promising for next year. In excitement for all flavors earthy, bright, and infused with spring, this: a simple twist on roasted asparagus and mushrooms which pairs them with the bright flavor of lemon and a ginger-lemongrass vinaigrette I like to make. The leftover dressing can be stored for use on a fresh spring greens salad as well.

ROASTED ASPARAGUS AND MUSHROOMS WITH LEMONGRASS-GINGER DRESSING

lm8post½ pound cremini mushrooms, halved or quartered if large
1 bunch asparagus, trimmed
3 tablespoons quality olive oil
Sea salt & fresh ground black pepper
Ginger Lemongrass Dressing (follows)
Sliced lemons (optional)

Preheat oven to 425. Place the asparagus and mushrooms on a baking sheet, drizzle with olive oil, then toss to coat the asparagus completely. Arrange asparagus and mushrooms in an even layer then sprinkle lightly with salt and pepper. Roast in the preheated oven stirring once, about 15 minutes or until the asparagus is tender but still crisp.

Transfer the asparagus and mushrooms to a serving platter and drizzle with dressing to taste. Garnish with slices of lemon if desired.

LEMONGRASS-GINGER DRESSING

2 stalks lemongrass, trimmed and finely chopped
2 tablespoon chopped ginger
1 tablespoon chopped shallots
1/2 tbsp chopped garlic
1 tbsp fresh lemon juice
½ tsp chili flakes
1/4 cup olive oil
2 tbsp rice vinegar
1 tbsp tamari

Shake all ingredients to combine.

NOTES:
With regard to the dressing, I like spice, a known fact. If you prefer the spice turned down, cut the chili flakes by half. And if a bump in sweetness suits your palette, add a tablespoon of honey to the mix in lieu of the tamari.

The dressing will keep for a few days covered and refrigerated.

Natural hues.

es1postThe fertility rites of spring are in full force, trees budding and blooming, seedlings sprouted and growing voraciously, birds nesting, rabbits stirring. There is a soft beauty in the gentle themes of the Easter celebration, the stunning examples of years of adaption of the symbols of equinox rituals into the imagery of the Christian church, all bundled and prettily packaged in the palest tones of mother nature. And outdoors the velvety golds, pale yellows, baby pinks, dusty roses, bright lilacs, deep violets, and soft lavenders of the flora are particularly splendid in the early warmth of this precocious spring, the garden and flowerbeds are coruscant with luminescent young green, and es2postthe sky is the clearest blue nearly every day. Inspired by all the lambent colors of youthful nature, this year’s Easter (which came early for us as necessitated by our shared family) involved not only a garden themed Easter basket delivery from an early Easter bunny but also a game of playing botanist, chemist, and artist in the kitchen. This time not for a recipe, but rather for the dying of Easter eggs without the use of chemically made dyes.

If you’ve ever used beets in anything, you’ve seen their nightmarish ability to render any surface bloody stained. And of course there’s the ghastly nature of grape juice on pale colored rugs and permanent smeared acid green of grass stains on anything pale and ill-advised for outdoor wear. But as with all things tedious, those same annoying qualities can be useful, with a change of application. In this instance, those same natural stains became stunning natural dyes.

es3post

es4post

E’s face (and Josh’s, for that matter) at the turning of plain water, vegetables and spices into tiny mason jars of bold patinas was absolutely magical. And the rustic jewel-toned results of our experimenting were nothing short of nature’s own magic themselves. For a bit of nature’s own finery on your Easter holiday, here is a simple guide to creating the standard egg dying colors with kitchen staples. Happy Easter from our home to yours.

es7post

Natural Dye Easter Eggs

Boil your desired number of eggs. Remove from hot water when cooked and set aside to cool. Meanwhile, create your dye colors as explained below. When cool enough, strain each color liquid into an individual cup or bowl large enough to submerge an egg in, making sure to remove all of the solid ingredients. When the eggs are cool, rub shells with white vinegar to help dye adhere. Submerge eggs completely in dye color of choice for 5-10 minutes. (The longer they soak the deeper the color tone.) Remove eggs from dye and set on a paper towel lined plate to dry. Enjoy.

es5post

RED: Coarsely chop one large beet root. In a small saucepan, bring 1 ½ cup of water to a boil. Add chopped up beet to water and allow to boil for 2 minutes before removing from heat. Steep for approximately 5 minutes, or until the cooked liquid turns dark red.

PINK: Peel the outer skin from two red onions. In a small saucepan, bring 1 ½ cup of water to a boil. Add the onions skins to water and allow to boil for 5 minutes before removing from heat. Steep for approximately 5 more minutes, or until the cooked liquid turns dark red.
*Alternatively, if your beet had its red stem attached, the chopped up stem could be used to create a pink dye as it doesn’t turn the water as red as the beet root.

YELLOW: In a small saucepan, bring 1 ½ cup of water to a boil. Add 1 tablespoon of turmeric to water and allow to boil until turmeric begins to dissolve before removing from heat. Steep for approximately 5 minutes, or until the turmeric is completely dissolved.

es6post

GREEN: Coarsely chop a large handful of dark spinach leaves. In a small saucepan, bring 1 ½ cup of water to a boil. Add chopped up spinach to water and allow to boil for 5 minutes before removing from heat. Steep for approximately 5-10 minutes, or until the cooked liquid turns dark green.

BLUE: Coarsely chop the dark outer leaves of one head of purple cabbage. In a small saucepan, bring 1 ½ cup of water to a boil. Add chopped up cabbage leaves to water and allow to boil for 5 minutes before removing from heat. Steep for approximately 5-10 minutes, or until the cooked liquid turns blue violet.

PURPLE: Heat 1 ½ cups of grape juice to a boil and allow to cool slightly before using as a dye.

NOTES:
es9postThe above colors are only those shown in the photos and these ingredients are only the tip of the proverbial iceberg. Experiment and let them be inspiration for you in creating more additions to a rainbow of Easter eggs from the items in your own kitchen. Carrots, paprika, and other colorful items would make stunning dyes as well. I was limited to brown eggs, and although I was pleased with the results, white, pink, or blue eggs could easily achieve even more beautiful hues. (White eggs will give you the truest shades.) Please do comment below with any additional vegetables, fruits, or spices you have great luck in dying with.

As seen in the photo, we created our own egg dipper with a cut up metal hanger, which works great if you multiple children as one hanger will yield 3-5 dippers. However, spoons work just as well if the cups you are using have enough space.

Be sure to refrigerate cooked eggs promptly after dying if you plan to eat them. Consuming eggs used for egg hunting and other Easter activities is not advised.


Rosemary Chicken Soup with Roasted Root Vegetables & Caramelized Onion.

It is spring, without a doubt, mostly comforting warm with a gentle light breeze. Blossoms have begun to dot the trees and bright green spears of bulbs have erupted all over the landscape. Soft yellow daffodils line the fence and the deep purple irises won’t be far behind.

spr6post

spr7post   spr8post

Inside all the seeds best started indoors have already grown, tiny green sprouts of various heights becoming larger every day and the already larger early spring veggies have been transplanted to the garden, first peas and spinach planted, carrots and radishes sewn.

spr9post

spr10post

But in spite of all that tepid weather and new growth casting out of the winter season, the wet season has begun here on the plains and the cooler dreary drizzling days simply call for soup. Heavy winter soups won’t do in the early spring climate, but rather something lighter was called for and so this soup, a simple mashing together of other older recipes I’ve had for too long, a good use for available ingredients when a spring soup fix is needed.

ROSEMARY CHICKEN SOUP WITH ROASTED ROOT VEGETABLES & CARAMELIZED ONION
This is a soup that is so simple it relies on having the freshest and best quality ingredients. Do not go cheap. With so few required ingredients, it is worth a slight splurge. The onions cook down to a delicate sweetness that absolutely dances with the brightness of the rosemary, coloring the broth to a rich savory caramel tone. And the potatoes, pre-roasting gives them firmness but once cooked in the soup they are absolutely buttery melt in your mouth delicious. Taste before seasoning with salt and pepper however, as spices can easily be overdone with this recipe.

spr11post¾ lb small heirloom potatoes
3 large carrots or 1/2lb baby carrots
1 large onion, halved and thinly sliced
2 cups roasted chicken, shredded
Coarse sea salt
1 tsp pepper
¾ tsp rosemary
2 tsp olive oil
6 cups chicken broth

Preheat the oven to 425. Line a baking sheet with parchment paper. Cut the potatoes in half lengthwise, then cut the pieces into halves or quarters depending on their size. On the prepared baking sheet, toss the potatoes olive oil and about a ½ tsp of salt. Roast for 10 minutes then stir. Continue to roast until tender, about 10 more minutes. Remove the potatoes and carrots from the oven and set aside. When cool enough to handle, cut any larger pieces to bit size and slide the carrots.

Heat oil in 10 inch skillet over med high heat. Add the onions and cook until they begin to brown, stirring occasionally. Reduce heat to medium. Cook until the onions are tender and caramelized, stirring occasionally. Remove the skillet from heat and set aside.

In a large saucepan, heat broth, rosemary, and black pepper to a boil. Stir in the chicken, reduce heat to medium and cook for 5 or so minutes. Add the potatoes and carrots and allow to cook 5 minutes more. Stir in onions, flavor with additional salt and pepper to taste and serve immediately.


Seed starting and the novice.

Outside the garden has been expanded by about twenty feet in two directions and the fence reset, the ground has been tilled, and the overgrowth project continues in the woods, clearing, cutting, and stacking. Spring bulbs and early blooming shrubs are beginning their show and the early cool season’s veggies are hardening off while inside the early and mid-summer season vegetables are sprouting in rapid succession. All the prep for the growing season is moving rapidly toward fruition.

sds2post

sds1post

Inspired by all this new growth of early spring and the sight of tables full of seeds starting, a quick guide to seed starting rooted in experience seems in order. Starting your veggies indoors gives you not only the advantage of a stronger harvest by besting your local climate but also of not spending a ridiculous amount of money on transplants and giving you a seemingly endless variety from which to choose. Besides, the satisfaction of nurturing your plants from start to finish cannot be understated. But if you’ve ever failed with seeds you know exactly how frustrating the process can be at times, especially on your first try. While you will almost inevitably fail at some point with seeds no matter how experienced you become, here are five key pieces of advice from my experience starting seeds indoors:

Too much, too soon. It’s no secret I am a seed collector from way back and keep a staggering inventory of seed types. However, I also have a sizeable garden plot and I tend to gift plants during the spring. But for the first year (or year two do-over) space, experience, and time should be your very key words. No matter how ambitious you feel or how tempting all those pictures in the shiny seed catalogue are, I strongly suggest starting with at most 5-10 varieties based on time and space. Once you know what your schedule and planting area allow, decide what you want whether that is a basic selection or one geared more toward your personal cooking taste. Also consider your climate when choosing seed types. And most importantly the first year, you have no idea how time consuming nurturing young plants can be until you try it. Starting with a handful of plants allows you to gain that knowledge and in the future calculate how much more your schedule allows, rather than starting with an overabundance, burning out, killing if ever germinating dozens of seedlings, and throwing your hands up in failure. After the first year or two, when you’ve harnessed the basics of growth and tending and have a better idea what you do and don’t like gardening wise, start expanding.

It seems like a silly mistake, but be sure to individually label each of your seeds. Forgetting to or postponing labeling will inevitably lead to confusion.

It seems like a silly mistake, but be sure to individually label each of your seeds. Forgetting to or postponing labeling will inevitably lead to confusion.

Stress. Stress is a killer and plants are not exempted from that rule. Improper amounts of water, light, and warmth (see below) can create stress but two other common forms of stress are fertilizer burn and transplant shock. Seedlings will need fertilizing at least once before transplanting (3-4 weeks from after sprouting, typically) but even the most mature plant can fall victim to fertilizer burn, so fertilizer must be heavily diluted and applied carefully. A spray mister and water tray will be your best friends for both fertilizer application and watering your seedlings (details in the water section).

With regard to transplanting, I strongly suggest planting them in a single container until outdoor transplanting or trying homemade seed pods as described here which simplify the potting up process. Even then, reduce the process of potting up to only one step per day for the baby plant so that it need only recover from one stressor at a time. (Potting up is the process of taking your seedling from seed starting pods upward in pot size to account for its growth until it is time to plant outdoors. An excellent how to guide can be found here.) And when it comes time to transplant your pampered plant into the garden, you’re in for disaster if you skip hardening them off. It can be time consuming if you overdo from the outset with too many plants, but if you start low volume with just a few plants, it’s fairly simple. About a week or two before planting them out, when the days become warm enough, begin taking your baby plant outside. The first day only set them out for a few hours splitting the time between shade and sun, the second day set them out a couple of hours longer, still longer the next, and so on until it’s time to transplant. This allows them to acclimate from the cozy indoors to the more harsh environment outside preventing issues such as windburn, freeze, and sunburn. And also, when you do transplant, do not do so at the peak of day in the bright sunshine. Either choose an overcast day or plant when the sun is low and try not to disturb the rootball during the transplant.

sds5post

Light & Warmth. Don’t give into the temptation to use even the brightest window in your house as your light source. It not only likely won’t be enough light no matter how much sun it lets in, but the cold from outside will get through. Grow lights are available online or shop lamps are a handy option. They provide both light and heat and can be hung in such a way that they are easily adjusted upward as your young plant grows. From the very beginning, your light source should be directly above and two to three inches from your seedlings at all times. This provides for the straightest, strongest growth. By leaving the lights on 12-14 hours a day, you are both imitating summer sunshine and creating a significant difference in temperature even indoors when the lights are on and off (10-15 degrees typically) which helps prepare your seedling for the outdoors environment.
* Some less common species do not appreciate any swings in temperature as seedlings, an issue you should be aware of as you start expanding your seed selection. A few minutes of research will let you know if your new seed type falls into the latter category.

sds6post

The soil. Always, always use new soil with seeds. They are extra sensitive to bacteria so sterile soil is a must. You can make your own seed starting soil or purchase it from your local nursery, but it cannot be understated that it must be sterile. (Also be sure to sterilize the containers you plan to use with diluted vinegar if you aren’t using a biodegradable type.) If you’d done everything else correctly in the past but used old soil and had plants die on you or never germinate at all, that may likely have been the cause.

But by far the most common mistake with soil and planting seeds (both indoors and out) isn’t the soil itself, rather it is the planting depth. Simply put, plant a seed too deep and it will never emerge. Read the instructions for your particular seed and follow them to the letter. For example, even if you just planted one tomato type only seconds ago and are about to plant another, don’t assume they are the same. A cherry type tomato typical plants at a shallower depth than say a beefsteak. It may only be a ¼”, but a ¼” makes all the difference to a tiny seed trying to sprout. And if a seed needs light to germinate, it has to be surface sewn. Not covering a seed seems counterintuitive the first few times you do it, but for certain seeds the immediate light and warmth are musts for germination. Just pack the surface soil and gently press the seed into it, enough to give it good contact but without covering it.

Some seeds benefit from soaking before planting, but not all.

The water. Just like mature plants in the garden, your seeds live or die by water. A seed will rot in too much water and never sprout. Under water seedlings, they stress or dry out and die. Overwater them, they drown or develop fungus and die. Even moisture must be maintained throughout the process of starting seeds. The simplest way to do so before seeds emerge is to wrap their pots in plastic to seal in moisture and remove the plastic when they sprout. It will keep moisture even until the seedlings emerge. If you are using paper pots or otherwise logistically cannot wrap your plants, watering from the bottom prevents most overwatering issues by allowing the plant to soak up water through their pots. Simply set the pots in a plastic tray and fill the try to about ¼” of water. After about half an hour or when you notice surface moisture is beginning to appear, pour out any excess water from the tray. (Fertilizer is best applied in the same way diluted in the water.) A mister spray bottle to water from above will prevent both overwatering and soil surface disturbance. How often you water your seedlings will depend on the dryness of the indoor air.

Here’s to the best of luck with your gardening this year.

Simple Chicken Lo Mein

It is unusually warm the last week and the groundhog is calling for an early spring. With temperatures in the upper sixties and low seventies, I find myself more often outside, tilling, expanding the garden, finishing final pruning, prepping flowerbeds and dotting our acreage with wood stacks from the trees we are thinning. Sunsets are lengthening and twilight finds us on the porch relaxing, springtime breezes and summer afternoons coming so close we can taste them. Even my flowering quince has already begun to bloom. (Another snow won’t come as a surprise however. This is Oklahoma, after all.) But with all this unseasonable warmth, my cravings for soups and winter fare are tapered and for this week’s recipe the Chinese New Year is the inspiration.

lm1post   lm2post

This simple version of chicken lo mein takes no time to throw together and has saved me an awful lot on take out over the years. Being where we are and delivery not being an option, it’s perfect when those cravings hit.

Happy lunar new year and may the year of the monkey be lucky for you.

lm3post   lm5post

SIMPLE CHICKEN LO MEIN
3 tbsp hoisin sauce
¼ cup chicken broth
3 tbsp soy sauce
2 tsp toasted sesame seed oil
1 tsp cornstarch

lm7post½ pound lo mein noodles
Olive oil
1 tbsp finely chopped ginger
1 med onion, thinly sliced
1 cup sliced mushrooms
½ cup thin sliced carrots
1 cup broccoli florets
1 cup sugar snap pea pods
1 15oz can baby corn, drained
1 can sliced water chestnuts, drained
1 lb skinless, boneless chicken, sliced bite size

In a small bowl, whisk together the first five ingredients and set aside. Cook the noodles according to package directions, drain, rinse and set aside. In a wok, heat 1 tablespoon of olive oil over med high heat and stir fry the ginger for about 30 seconds. Add the onion and stir fry for about 2 minutes. Add the mushrooms and carrots and stir fry 2 minutes more. Finally add the broccoli, sugar snap peas, baby corn, and water chestnuts and stir fry 2 more minutes then transfer the vegetables to a large bowl. Heat another tablespoon of olive oil and stir fry the sliced chicken until it is no longer pink, about 6-8 minutes. Add the noodles, sauce, and vegetables. Turn the heat down to medium and lightly toss the mixture until heated through, about 3 minutes.

Notes:
This recipe makes a lot, about 8 servings. Although the leftovers are tasty, I’d cut it in half if you don’t need a large amount.

If you can’t find lo mein noodles, angel hair pasta works in a pinch. It isn’t quite the same, but it’s good nonetheless.